When your default SugarCRM/SuiteCRM modules are not enough to fulfill your requirements then we need to create our own plugin.
What if your new module still does not fit your requirement? What if you need to construct some sort of special functionality that Sugar does not provide out of the box? Then building a module manually is definitely the course of action you will need to take to accomplish your goals, and in this tutorial you’ll take a step-by-step journey on how to do this. Let’s begin our journey to create new custom module.
If you have got to this point then you have decided that building a module by hand is exactly the course of action you wish to embark on. The process to do so requires a bunch of steps that are important, so that your module is properly recognized by the Sugar instance. Missing any one step could potentially result in your module not functioning as expected, whether it because of errors in the application or data loss.
It is quite easy to create our own plugin in SuiteCRM and SugarCRM. They are providing us a great inbuilt GUI tool called Module Builder. The main benefit of this plugin is that, we also can use this plugin in other SuiteCRM and SugarCRM instance too.
Module Types
Using module builder we can create following types of modules :
-
Basic: A basic template with only fields for a name and description
-
Company: Fields that would normally be used with a company, such as name, address, phone, website, or industry
-
File: Used when the object stores files that the user uploads.
-
Issue: For modeling an issue or job tracking system
-
Person: Fields that represent a person, such as name, address, phone, or email.
-
Sale: Used when the object is for sales transactions or forecasting
Create Module Using GUI
Now let’s see the steps to create our own custom module/plugin in SuiteCRM.
- Step 1: Go to Admin panel.
- Step 2: Click on Module Builder
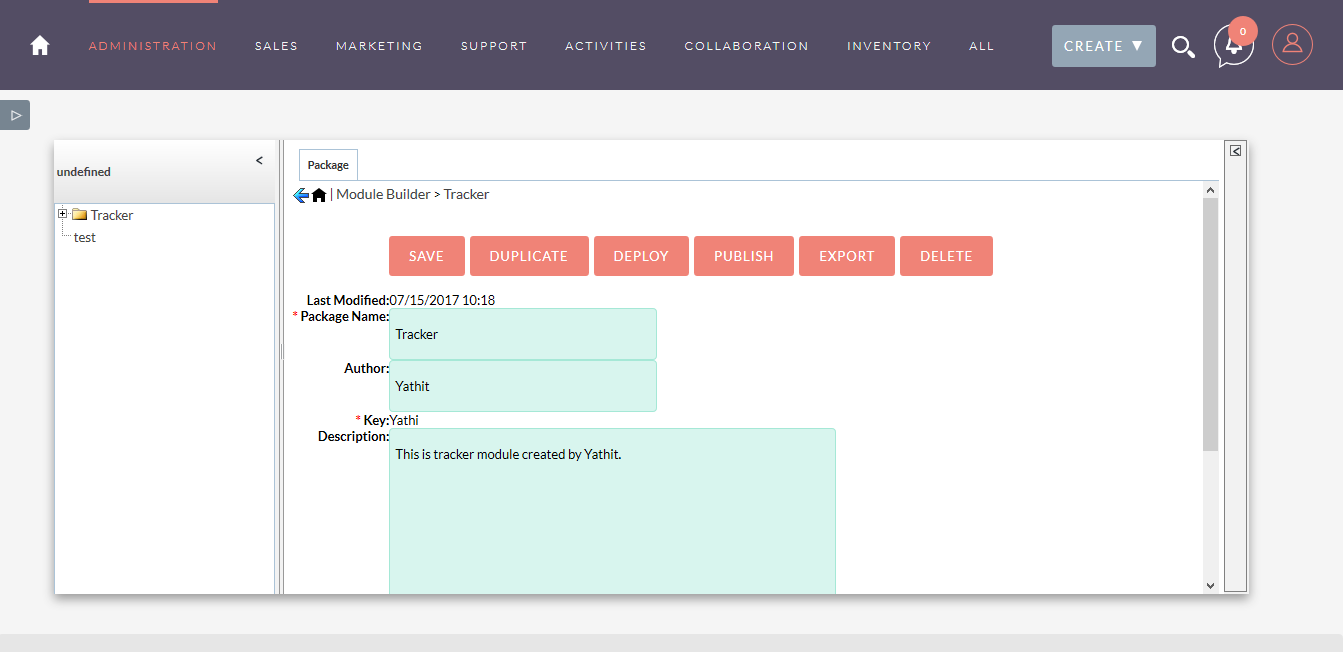
- Step 3: Click on Add Package Module Builder organizes things into units called Packages, each of which can contain one or more modules.
- Step 4: Now you need to add package name, author, key and description. Key will used as a prefix in database tables of your module.
- Step 5: Follow instruction below
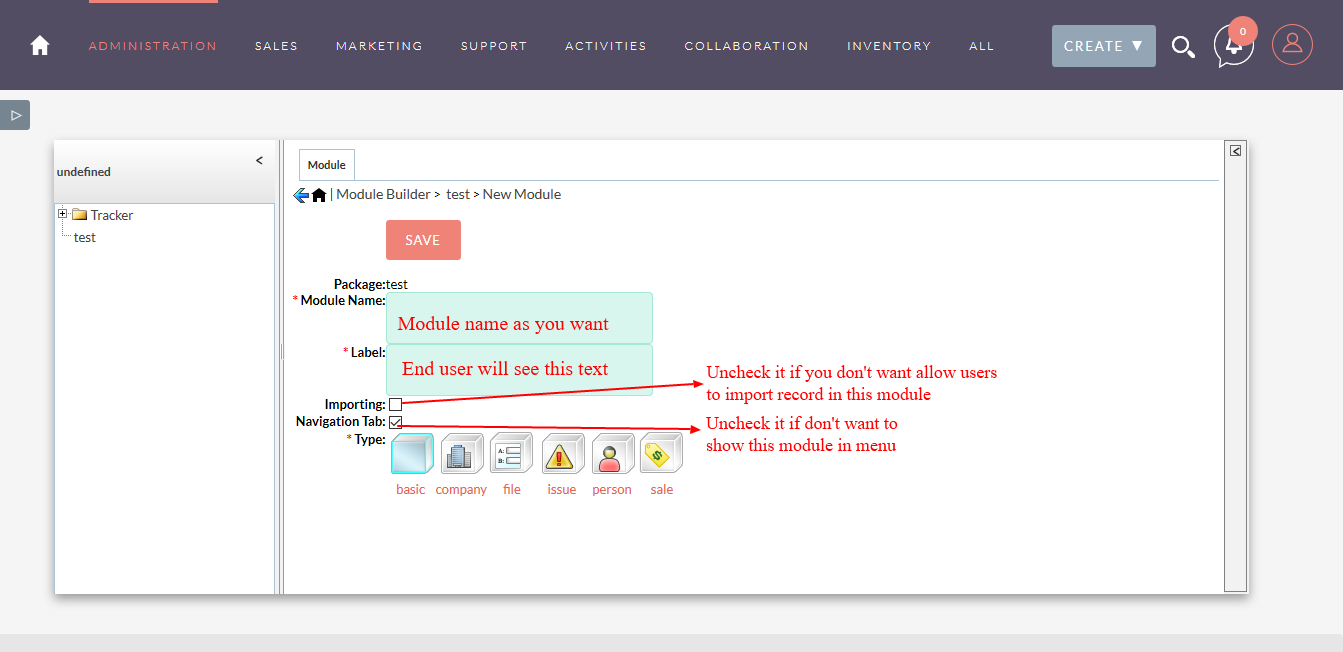
- Step 6: Now, after save; you can see many options like :
- Duplicate If you want to clone this module.
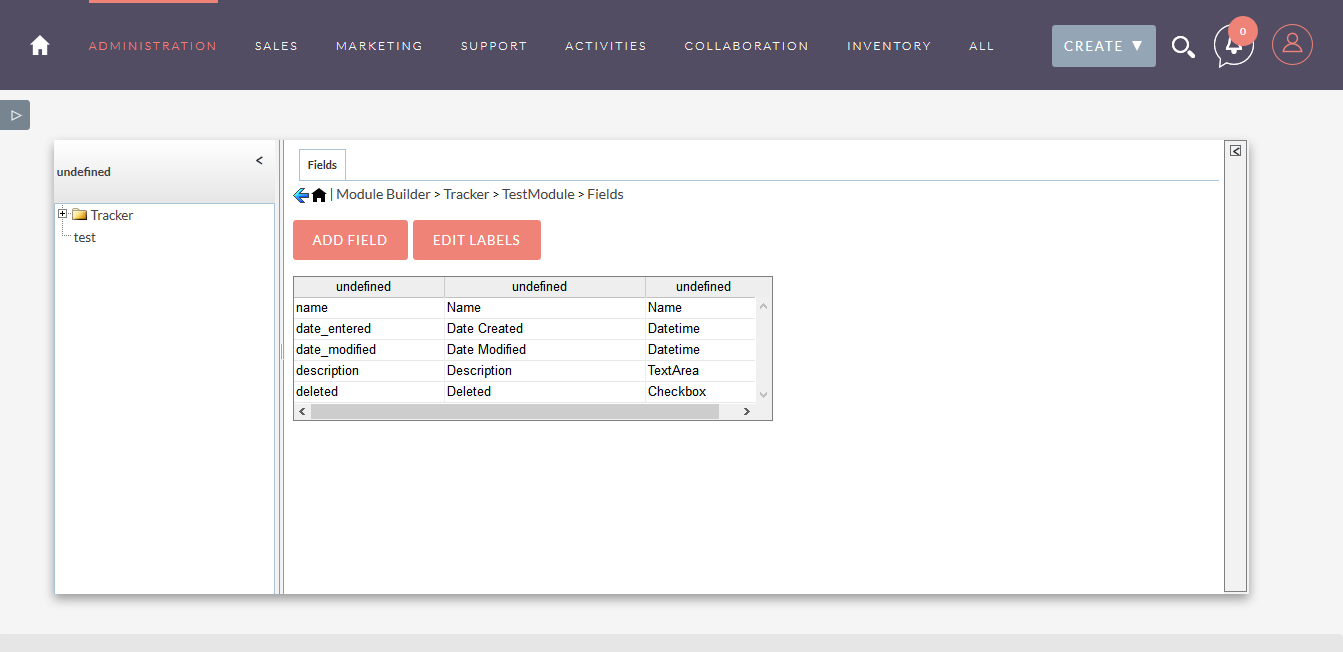
- View Fields Will show you all the default fields of this module.If you want to add more then you can add from View Fields -> Add Field
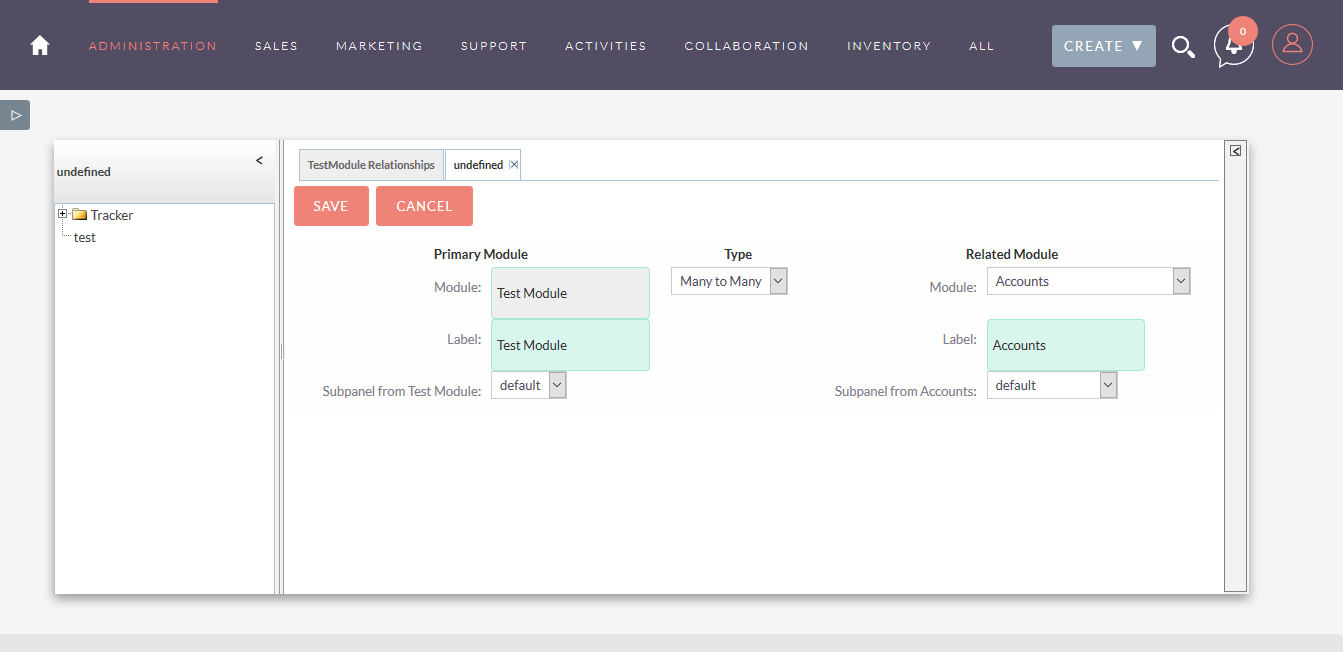
- View Relationship You can see module relation with other module and can add new relation with already available module.
- View Layouts You can set all the layouts same as we are doing in Studio for already available modules.
- Delete Definitely, if you don’t want this module anymore.Please note that this action is non-undoable action. You may lose your whole hard work if press “DELETE” by mistake.
Module Action
After completing all these steps, you will have following options to take action
Deploy
Install module package into the current running instance of CRM.
Publish
Publish the module package as a loadable package that can be installed into an another SuiteCRM instance using Module Loader.
Export
Export the module package as a loadable package that will only be installed back into Module Loader for further customization on the target system.
Custom Code In Custom Module
Till now, it was all about GUI. We have not write a single line of code - just Click - Drag and Drop. What if still it is not upto your requirement? You have to do custom code inside newly created module and also you have to include these new files in module package to copy along with module’s default files to another SuiteCRM instance.
Let’s take one simple example;
Suppose you want to create one tracker module which will store all the deleted accounts from your CRM
For this, first of all we will create one Company type module from module builder with name “Tracker” and then deploy it but it will create just structure, it will not store deleted account. Now we have to write one “before delete” logic hook for account module.
You need to create two file like this : logic_hooks.php KeepTrack.php
Now logic_hooks.php file will be look like this at path ./custom/Extension/modules/Accounts/Ext/LogicHooks/logic_hooks.php
logic_hooks.php
<?php
  $hook_array[‘before_delete’][] = array(
        1,
        'This will store deleted accounts in Tracker Module',
        'custom/modules/Accounts/KeepTrack.php,
        ‘KeepTrack’
        'storeDeletedAccounts'
  );
?>
KeepTrack.php file at path custom/modules/Accounts/KeepTrack.php
<?php

class KeepTrack
{
    function 'storeDeletedAccounts'($bean, $event, $arguments)
    {
      $oTracker = new Tracker();
      $oTracker->name = $bean->name;
      $oTracker->phone_work = $bean->phone_work;
      ...
      ...
      ...
      ...
      ...
      $oTracker->save();
     }
}
?>
Now you need to include this both files logic_hooks.php and KeepTrack.php in manifest file. So you need to include this both files in copy array of manifest.php file.
'copy' =>
  array (
    array (
      'from' => '<basepath>/custom/Extension/modules/Accounts/Ext/LogicHooks/logic_hooks.php',
      'to' => './custom/Extension/modules/Accounts/Ext/LogicHooks/logic_hooks.php',
    ),
    array (
      'from' => '<basepath>/custom/modules/Accounts/KeepTrack.php',
      'to' => 'custom/modules/Accounts/KeepTrack.php',
    ),
  ),
There is one alternative way of adding logic_hooks from manifest file and that is instead of adding file in copy array, add logic hooks in logic_hooks array of manifest file.
 'logic_hooks' =>
      array(
        0 =>
            array(
                'module' => 'Accounts',
                'hook' => 'before_delete',
                'order' => 101,
                'description' => 'This will store deleted accounts in Tracker Module',
                'file' => 'custom/modules/Accounts/KeepTrack.php',
                'class' => 'KeepTrack',
                'function' => 'storeDeletedAccounts',
            ),
         ),
Understanding Manifest
When we publish package, it is generating one .zip file package. Inside this zip folder, there will be one file with name manifest.php. This is the first file to run when we installing our plugin in any system.
Now our manifest file will be look like something this…
$manifest = array(
  'key' => 1397052912,
  'name' => 'Example Manifest',
  'description' => 'Example Description',
  'author' => 'SugarCRM',
  'version' => '1.0',
  'is_uninstallable' => true,
  'published_date' => '2014-04-09 14:15:12',
  'type' => 'module',
  'acceptable_sugar_versions' =>   array(
          'exact_matches' => array(
                  '7.2.0',
                  '7.2.1',
                  '7.6.0.0'
                  ),
                  //or
                  'regex_matches' => array(
                      '7\\.2\\.[0-1]$', //7.2.0 - 7.2.1
                      '7\\.6\\.(.*?)\\.(.*?)' //any 7.6 release
                  ),
          ),
      'acceptable_sugar_flavors' =>   array(
          'PRO',
          'CORP',
          'ENT',
          'ULT',
      );
      'readme' => '',
      'icon' => '',
      'remove_tables' => ''
    );

$installdefs = array (
  'id' => 'SpecLoginTrack',
  'beans' =>
  array (
    0 =>
    array (
      'module' => 'spec_logtrack',
      'class' => 'spec_logtrack',
      'path' => 'modules/spec_logtrack/spec_logtrack.php',
      'tab' => false,
    ),
  ),
  'layoutdefs' =>
  array (
  ),
  'relationships' =>
  array (
  ),
  'image_dir' => '<basepath>/icons',
  'copy' =>
  array (
    array (
      'from' => '<basepath>/custom/Extension/modules/Accounts/Ext/LogicHooks/logic_hooks.php',
      'to' => './custom/Extension/modules/Accounts/Ext/LogicHooks/logic_hooks.php',
    ),
    array (
      'from' => '<basepath>/custom/modules/Accounts/KeepTrack.php',
      'to' => 'custom/modules/Accounts/KeepTrack.php',
    ),
  ),
  'logic_hooks' =>
      array(
        0 =>
            array(
                'module' => 'Accounts',
                'hook' => 'before_delete',
                'order' => 101,
                'description' => 'This will store deleted accounts in Tracker Module',
                'file' => 'custom/modules/Accounts/KeepTrack.php',
                'class' => 'KeepTrack',
                'function' => 'storeDeletedAccounts',
            ),
         ),
For more information on manifest.php, please visit this All about manifest.php documentation.
Why Repair and Rebuild?
After installing your plugin in other suitecrm system, please don’t forget to run repair and rebuild. Although after instaling module SuiteCRM running repair and rebuild but it is recommended to see our new module working perfectly.
When we do repair and rebuild, following things happens,
- Javascript related changes will take effect
- Any def related changes (Defs like, Layout
defsandvardefs) - All custom added entrypoint.
- All added custom logic hooks.
If we don’t do repair and rebuild, it may possible that we can’t see our code change effect.It is also recommended to do cache clear.